Showing posts with label Cricut. Show all posts
Monday, May 16, 2011
Birthday Party Invite
I thought you might like to see the birthday party invitations I've made. Luckily I only needed to make 16. I must say, in the end, I was very excited about the way they turned out. Everything is cut using my E with cartridges. I stamped the letters on the pennants. The baker's twine is from The Kraft Outlet. The pattern paper is from Imaginisce and the cardstock is from Core'dinations.
I don't have an Imagine. The inside was printed on my laser jet and then cut using my E.
I'm working on a banner for the entrance to the carnival. I've already started making all of the carnival games. I think it should be a wonderful and fun party for a little one. I'm certain you will be tired of this party by the time it is over.
What do you think of the invite? Do you like the ticket on the inside?
Thursday, March 24, 2011
It's the Little Things
Bedtime at my house is a battle. The Wonderkid HATES to sleep. He would rather do anything than lie still and fall asleep and so, every night we learn how long he can hold out before he falls asleep from sheer exhaustion. Adding to the frustration, I've set-up a routine that I HATE (or at least I hate most of the time).
The Wonderkid only falls asleep with me cuddled right next to him. I know, I know, every book in the world will tell you not to do this. Let them cry it out, they say. Give them something to replace you and let them sleep with that item (I have friends that got their children to sleep by themselves by giving the child their bra). OK, so I know that is what they say but for the longest time I loved the quiet time I shared with the Wonderkid as he fell off to sleep. And in honest moments, I still enjoy parts of it.
I love listening to him make up songs about his day. I love the crazy questions he asks which tell me what about his day was most interesting to him.
And, I LOVE that he'll turn to me and say, "Mommy, know what?" and I'll say, "No, what?" and he'll say (with the most wonderful giggle in his voice because he knows that I know what is coming next) "I LOVE YOU". Now, how can I tell him he must go to sleep in his own room all by himself and I won't come in to cuddle with him and help him fall asleep?
So, we continue this routine and most of the time I get frustrated and count down the time until he falls asleep. Last night, though, he fell asleep quickly and I could still see him in the twilight. I turned and looked at him so peacefully sleeping and my heart turned over. I stopped breathing for just a moment and I remembered just how much this little person means to me.
So, I bring you this layout using two pictures of the Wonderkid sleeping. In the top one he is 9 months old and in the bottom he is 3 1/2 years old.
For anyone wanting the details about the layout, the paper is from Core'dinations (Black Magic Petrificus under Sleeping; the letters are White Wash Windowpane; the background is Canvas Texture). The font on the journaling is Carbon and the titles are all Bernard MT Condensed. I sanded the word baby and I ripped a strip of the Black Magic.
The Wonderkid only falls asleep with me cuddled right next to him. I know, I know, every book in the world will tell you not to do this. Let them cry it out, they say. Give them something to replace you and let them sleep with that item (I have friends that got their children to sleep by themselves by giving the child their bra). OK, so I know that is what they say but for the longest time I loved the quiet time I shared with the Wonderkid as he fell off to sleep. And in honest moments, I still enjoy parts of it.
I love listening to him make up songs about his day. I love the crazy questions he asks which tell me what about his day was most interesting to him.
And, I LOVE that he'll turn to me and say, "Mommy, know what?" and I'll say, "No, what?" and he'll say (with the most wonderful giggle in his voice because he knows that I know what is coming next) "I LOVE YOU". Now, how can I tell him he must go to sleep in his own room all by himself and I won't come in to cuddle with him and help him fall asleep?
So, we continue this routine and most of the time I get frustrated and count down the time until he falls asleep. Last night, though, he fell asleep quickly and I could still see him in the twilight. I turned and looked at him so peacefully sleeping and my heart turned over. I stopped breathing for just a moment and I remembered just how much this little person means to me.
So, I bring you this layout using two pictures of the Wonderkid sleeping. In the top one he is 9 months old and in the bottom he is 3 1/2 years old.
For anyone wanting the details about the layout, the paper is from Core'dinations (Black Magic Petrificus under Sleeping; the letters are White Wash Windowpane; the background is Canvas Texture). The font on the journaling is Carbon and the titles are all Bernard MT Condensed. I sanded the word baby and I ripped a strip of the Black Magic.
Sunday, February 20, 2011
Fall Card
I think I desperately needed to do a card without an immediate purpose. And so, I was very excited about the challenge over at Fantabulous Cricut Challenge Blog. The challenge for this week is a creation with at least one Cricut cut that shows your favorite season. While I know a lot of people will be doing spring and flowers and all that, I couldn't look at another pink or green piece of paper (at least not for a couple of hours).
I think it has been at least a few days since I mentioned how much I love Core'dinations paper. I received a huge box of it just this last week (it weighed 35 pounds and I think at least 30 of those pounds were Core'dinations papers). All of the paper, except the cardbase, are Core'dinations. I used two Sissix embossing folders from Stu Kilgore to make the card topper. The card topper is from the Sandy Tones Color Core All In the Family pack. The leaves are all cut out using my cricut and the Sesame Street Seasons Cart. I bet you never thought to look on that cart for leaves, did you? I used my Tim Holtz sander to bring out more of the embossed images and my Tim Holtz paper distresser to rough up the edges.
Here is a closer look at the card. You can see some of the distressing on the bottom right corner of the card topper.
Can you tell that the wheelbarrow originally was filled with sunflowers which I covered up with the leaves? The leaves were cut from a package of 1.75 x 12 inch strips of Core'dinations ColorCore Cardstock. This package of paper showed up in my mailbox one day last month without an explanation. I'm not one to look a gift horse in the mouth so, I'm using it. At first I couldn't imagine what I would do with these little strips but I must say, they were perfect for these small leaves. I could have made the leaves almost twice as big and still fit them on the strips.
Thank you for checking out today's card. I'm hoping to put together a couple additional cards for tomorrow. We'll see if the weather calls me outside or if I still get some crafting done. I've been sitting in my craft space with all of the windows open. It is such a wonderful feeling. I think spring might have arrived here in Georgia.
I think it has been at least a few days since I mentioned how much I love Core'dinations paper. I received a huge box of it just this last week (it weighed 35 pounds and I think at least 30 of those pounds were Core'dinations papers). All of the paper, except the cardbase, are Core'dinations. I used two Sissix embossing folders from Stu Kilgore to make the card topper. The card topper is from the Sandy Tones Color Core All In the Family pack. The leaves are all cut out using my cricut and the Sesame Street Seasons Cart. I bet you never thought to look on that cart for leaves, did you? I used my Tim Holtz sander to bring out more of the embossed images and my Tim Holtz paper distresser to rough up the edges.
Here is a closer look at the card. You can see some of the distressing on the bottom right corner of the card topper.
Can you tell that the wheelbarrow originally was filled with sunflowers which I covered up with the leaves? The leaves were cut from a package of 1.75 x 12 inch strips of Core'dinations ColorCore Cardstock. This package of paper showed up in my mailbox one day last month without an explanation. I'm not one to look a gift horse in the mouth so, I'm using it. At first I couldn't imagine what I would do with these little strips but I must say, they were perfect for these small leaves. I could have made the leaves almost twice as big and still fit them on the strips.
Thank you for checking out today's card. I'm hoping to put together a couple additional cards for tomorrow. We'll see if the weather calls me outside or if I still get some crafting done. I've been sitting in my craft space with all of the windows open. It is such a wonderful feeling. I think spring might have arrived here in Georgia.
Thursday, January 20, 2011
Caught a Bug Card
I made this card for Going Buggy's Party. She is celebrating a ton of stuff, including 500,000 visits. That is pretty amazing. I love Enfy's work. She does a lot of coloring with ProMarkers and she makes some incredible cards, calendars and other cool stuff. So, when she created a challenge (which is going to be judged which makes me just too nervous to think) I wanted to do something fun and different.
The challenge was to use a bug on the project. Well, I decided to use a few bugs. The centipede is from Walk In My Garden. The other two bugs are from Boys Will Be Boys. The jar is from Doodlecharms. I made the jar out of acetate (can you tell I'm on an acetate kick, yesterday it was acetate stencils, today it is an acetate feature. I cut the jar 5 times. Once for the shadow, once for the back, once for the lid, once for the top layer and once for the cut out of the bottom. I thought it gave it a little depth to have the bottom cut out and inked. Then, I pop dotted the jar away from the shadow.
I tried to get a picture of the layers but it is tough to see.
I had to be very strategic in where I placed my pop dots so they wouldn't show through the jar.
These are the bugs in the jar.
The sentiment was computer generated. It says, "I heard you caught a bug". Everyone in my family has a low grade cold so we are all just a little miserable but not bad enough to stop and do nothing. It is no fun at all.
The pattern paper is DCWV from the Songbird stack.
So, what do you think?
Wednesday, January 19, 2011
Kraft Christmas Card Using a Stencil
This week's challenge at Bah Humbug was to use a stencil on a Christmas project. Now, I love the idea of stencils (and masks). In fact, I've bought 3 or 4 of Tim Holtz's masks but I've never used a single one. Each and every one is still in its packaging waiting for me to use them. Shh, don't tell anyone, I like to pretend that ALL of my craft supplies were NECESSARY.
When I looked at the stencils I own, none of them really said "Christmas" to me. So, they are still in their packaging. However, I REALLY wanted to play along with the Bah Humbug Challenge.
So, I thought about it and decided that I couldn't justify buying more stencils or masks. I decided the best idea was to make my own stencil. I pulled out a piece of acetate (mine came from a package of overhead projector pages) and placed it in my Cricut. I cut out three snow flakes of varying size and style from the Winter Lace cart. On a side note, I kept trying to tell myself I didn't really need this cart but when it went to $12 recently I just couldn't pass it up and I'm so glad I have it. I've used it at least a half dozen times in just a couple of weeks.
Here are the snowflakes after I used them as a stencil.
I have cleaned them off since and I plan to put them next to the stencils I've purchased. I used my Tombow Repositionable tape to adhere the stencils to the card. Then I spread white A La Mode pigment ink over the stencils. On the card above, I used Versamark and A La Mode Sparkle Embossing Powder before I started the inking. The card below I applied the pigment ink with the stencils and then the embossing powder.
I think I like the first card better. What do you think?
When I looked at the stencils I own, none of them really said "Christmas" to me. So, they are still in their packaging. However, I REALLY wanted to play along with the Bah Humbug Challenge.
So, I thought about it and decided that I couldn't justify buying more stencils or masks. I decided the best idea was to make my own stencil. I pulled out a piece of acetate (mine came from a package of overhead projector pages) and placed it in my Cricut. I cut out three snow flakes of varying size and style from the Winter Lace cart. On a side note, I kept trying to tell myself I didn't really need this cart but when it went to $12 recently I just couldn't pass it up and I'm so glad I have it. I've used it at least a half dozen times in just a couple of weeks.
Here are the snowflakes after I used them as a stencil.
I have cleaned them off since and I plan to put them next to the stencils I've purchased. I used my Tombow Repositionable tape to adhere the stencils to the card. Then I spread white A La Mode pigment ink over the stencils. On the card above, I used Versamark and A La Mode Sparkle Embossing Powder before I started the inking. The card below I applied the pigment ink with the stencils and then the embossing powder.
I think I like the first card better. What do you think?
Thursday, January 13, 2011
Kraft Thank You Card with a Florish
One of my favorite things to craft with is Kraft paper. I know it is brown and doesn't have a lot to it but it has such an organic look to it and I love to use it as a base. I'm not crazy about white (too easy to get dirty) and cream, vanilla, beige can be tough to match. I have some "cream" colored cardstock that has way too much yellow in it. In fact, it probably should be called "butter". OK, ok, enough about my love of Kraft paper and lets get on with it.
I recently found a blog and company the Kraft Journal and Kraft Outlet. Oh boy, this could be fun. They did a challenge this week to make something with a flourish. At first this doesn't seem to fit together. Florishes are fancy and elegant, Kraft paper is organic and down-to-earth. However, I wanted to play along. I decided to be very literal with the design. Here is my design. I used my Cricut Expression to cut the file. Don't blame the Cricut for the edges on the dark brown cardstock. It actually looks much better in person. It is funny, some things look better on the blog and others look better in person. I get very frustrated with dark cardstock with a white core. This is one of those.
This is a thank you card for a friend of mine. I don't think she is reading my blog so it should be safe to show before she actually receives it. The florish is a free file from SVGCuts. You can find this cut (already laid out as an A2 card) here. While you are there, I recommend looking at their other cuts. If you have SCAL and a Bug, you will love their work. It cuts like a dream and really is quite beautiful.
I used it in my SCAL2 program. It was designed as the top layer (the one on the right) but I wanted to add a shadow to it. SCAL has a wonderful feature allowing you to make a shadow or a blackout shadow of anything you choose. You can make just a tiny shadow or a much larger shadow. Or you can make a blackout of the items. This function is under "appearance" on the right side when you have the handles highlighted on an object. If you haven't done anything, it will say "Normal" if you want a shadow, you have seven options on the pull down menu (pointy, rounded and straight shadow, blackout, pointy, rounded and straight shadow blackout). Then you choose how thick to make your chosen option.
I also used SCAL2 for the lettering. I hate my handwriting so it is unlikely you will see me printing anything. Therefore, I love to use my Cricut to do headlines or lettering such as this card. I have a full set of the Cri-Kits pens with the holder. I love them. They work so much better than the ones that come from Provo Craft (mostly because they aren't markers, they are pens) and they work better than my old method of inserting a sharpie or gel pen into a pencil holder and then trying to get the placement "just right" so I could get a nice line. This font is part of the Lucinda package of fonts and was already loaded into my computer.
As much as I like the organic look of Kraft paper, I decided the card need a little bit of bling. I used a combination of embellishments from Creative Charms (another favorite of mine) and Recollections, the Michael's brand. I think they look great together. If you haven't checked out Creative Charms, I highly recommend them. They have a Deal of the Month and Kit of the Month. I love them and this months is great for valentines.
I hope you liked my card. I'll try not to "talk" so much tomorrow.
I recently found a blog and company the Kraft Journal and Kraft Outlet. Oh boy, this could be fun. They did a challenge this week to make something with a flourish. At first this doesn't seem to fit together. Florishes are fancy and elegant, Kraft paper is organic and down-to-earth. However, I wanted to play along. I decided to be very literal with the design. Here is my design. I used my Cricut Expression to cut the file. Don't blame the Cricut for the edges on the dark brown cardstock. It actually looks much better in person. It is funny, some things look better on the blog and others look better in person. I get very frustrated with dark cardstock with a white core. This is one of those.
This is a thank you card for a friend of mine. I don't think she is reading my blog so it should be safe to show before she actually receives it. The florish is a free file from SVGCuts. You can find this cut (already laid out as an A2 card) here. While you are there, I recommend looking at their other cuts. If you have SCAL and a Bug, you will love their work. It cuts like a dream and really is quite beautiful.
I used it in my SCAL2 program. It was designed as the top layer (the one on the right) but I wanted to add a shadow to it. SCAL has a wonderful feature allowing you to make a shadow or a blackout shadow of anything you choose. You can make just a tiny shadow or a much larger shadow. Or you can make a blackout of the items. This function is under "appearance" on the right side when you have the handles highlighted on an object. If you haven't done anything, it will say "Normal" if you want a shadow, you have seven options on the pull down menu (pointy, rounded and straight shadow, blackout, pointy, rounded and straight shadow blackout). Then you choose how thick to make your chosen option.
I also used SCAL2 for the lettering. I hate my handwriting so it is unlikely you will see me printing anything. Therefore, I love to use my Cricut to do headlines or lettering such as this card. I have a full set of the Cri-Kits pens with the holder. I love them. They work so much better than the ones that come from Provo Craft (mostly because they aren't markers, they are pens) and they work better than my old method of inserting a sharpie or gel pen into a pencil holder and then trying to get the placement "just right" so I could get a nice line. This font is part of the Lucinda package of fonts and was already loaded into my computer.
As much as I like the organic look of Kraft paper, I decided the card need a little bit of bling. I used a combination of embellishments from Creative Charms (another favorite of mine) and Recollections, the Michael's brand. I think they look great together. If you haven't checked out Creative Charms, I highly recommend them. They have a Deal of the Month and Kit of the Month. I love them and this months is great for valentines.
I hope you liked my card. I'll try not to "talk" so much tomorrow.
Monday, January 10, 2011
Christmas Card Embossed with a Holly Leaf
I have watched all of the wonderful cards created for some of the challenge blog sites and have been wanting to submit some items. In fact, the reason I initially created this blog was so I would have a place to post my cards for the different challenges. That was 6 months ago and while I've created a number of things, I haven't done a challenge since last July/August. I'm hoping that will change.
Without further ado, here is my Christmas card for today.
I wanted to try a new technique. I embossed a piece of white cardstock using the Tim Holtz Sizzix embossing folder, Merry Christmas. The embossed cardstock is 4 inches by 5.25 inches. I covered my brayer with green ink, then rolled it over the embossing folder. I must tell you, I was a bit nervous as I did this to one of my brand new embossing folders but it came off with just a baby wipe. My embossing folder looks just fine. I would have liked to have the ink a little darker and I'm not certain why the center section never quite inked the paper but I still like the effect. Then, I added a bit of holly (I used the cricut cut from Joy of the Season) and I put all of it on a card topper of red with gold glitter florishes. The card base is white card stock. The red paper comes from Little Yellow Bicycle.
Here is a close-up of the holly and the embossing.
I hope you like this and that it will inspire you to try something new, whether that is doing a challenge or a new technique.
Thank you for visiting my blog. If you like what you see, please consider becoming a follower.
Without further ado, here is my Christmas card for today.
I wanted to try a new technique. I embossed a piece of white cardstock using the Tim Holtz Sizzix embossing folder, Merry Christmas. The embossed cardstock is 4 inches by 5.25 inches. I covered my brayer with green ink, then rolled it over the embossing folder. I must tell you, I was a bit nervous as I did this to one of my brand new embossing folders but it came off with just a baby wipe. My embossing folder looks just fine. I would have liked to have the ink a little darker and I'm not certain why the center section never quite inked the paper but I still like the effect. Then, I added a bit of holly (I used the cricut cut from Joy of the Season) and I put all of it on a card topper of red with gold glitter florishes. The card base is white card stock. The red paper comes from Little Yellow Bicycle.
Here is a close-up of the holly and the embossing.
I hope you like this and that it will inspire you to try something new, whether that is doing a challenge or a new technique.
Thank you for visiting my blog. If you like what you see, please consider becoming a follower.
Tuesday, January 4, 2011
Sympathy Card for a Little Girl
This was a tough card to make. It is a sympathy card for a tweener whose grandmother passed away recently and unexpectedly. I didn't like any of the traditional symbols (dove, praying hands, lamb, etc). I know that it looks like it could be a valentines card from the front.
Here is the inside:
I thought the images on the front worked well with the sentiment.
I also was pleased with the way the trunk turned out. For those of you that read about my advent calendar from Christmas Village (you can see it here if you missed it), you know I fell in love with Perfect Pearls. Well, here they are again. I used them to make the edges of the trunk look like they are held together with metal.

I also added a piece of patterned paper to the inside of the lid so it would look like it was lined with cloth.
This is a picture of the trunk next to the paper I used to make the trunk. Don't you like the difference?
Then I added small brads by punching a hole in the trunk where the cut had small marks. I used my crop-o-dile and brads from Paper Studio.
Sympathy cards are very tough to do. What do you think?
Here is the inside:
I thought the images on the front worked well with the sentiment.
I also was pleased with the way the trunk turned out. For those of you that read about my advent calendar from Christmas Village (you can see it here if you missed it), you know I fell in love with Perfect Pearls. Well, here they are again. I used them to make the edges of the trunk look like they are held together with metal.

I also added a piece of patterned paper to the inside of the lid so it would look like it was lined with cloth.
This is a picture of the trunk next to the paper I used to make the trunk. Don't you like the difference?
Then I added small brads by punching a hole in the trunk where the cut had small marks. I used my crop-o-dile and brads from Paper Studio.
Sympathy cards are very tough to do. What do you think?
Sunday, January 2, 2011
Recipe/Photo Album
The idea for this project has been kicking around in my brain for quite some time. However, I had planned to make it for myself. In the end it became a present for my youngest brother. He enjoys cooking, he finds it's a stress reliever similar to how I feel about most cooking. So, I made this for him for Christmas.
This is the cover of the book. I planned on using my Bind-It-All for the binding but in the end it was a little over 2 inches thick and no one makes the binding rings large enough. I then planned to use O-Rings but the largest size you can buy at my Office Depot or Staples is 2 inches. It was a little tight but I was able to close them. I'm working on getting 3 inch rings so it will flip easily.
Here is a picture of one of the inside pages. It is actually an envelope mini-album. I used these envelopes
The envelope measures 9.5 inches by 6.5 inches. I have a ton of them around and use them constantly. They were the perfect size for this project. It meant each recipe card could be 8.5 inches by 6.45 inches and the pages measured at exactly half of an 8.5 by 11 inch piece of paper. I slit one side of the envelope, sealed the top as though I was mailing it and then covered them.
This is one of the pages with the recipe card pulled out. I made a frame for the picture using rolling pins found on "From My Kitchen". The phone is from the same cart. All of the recipe cards are made using a box from George and welding a tab off of "From My Kitchen".
Here is another page. I used the same rolling pin but this time I used the pie from Paper Dolls (I can't remember if it is Dress Up or Everyday).
This is the envelope with the recipe card inside.
Now pulled out. You can't read it very well but I used my Cri-Kits and wrote on the frame of this page. I used the same paper for the frame so it would blend in nicely. I also used my Cri-Kits to write the name of each recipe on the tab. I then colored them in using alcohol inks.
This is the Pumpkin Pie page. I make the pumpkin "glop" for the pies (not the canned pumpkin filling) that is why it explains which pumpkins to buy when making pumpkin pies. I had an extra pie so I put it on the recipe card instead of the envelope. The pie is made using "From My Kitchen" cart. The pumpkin is from SVGCuts' Heirloom Pumpkins.
This is a long recipe so it goes onto the back of the recipe card.
Here is the back of the recipe card and the back of the envelope.
I thought this was another great page. The turkey is from Doodlecharms cart. Again, you can see the recipe card inside the envelope...
and outside the envelope.
Here you can see the pages inside the back cover. I used almost exclusively DCWV stacks for this project (The Natural, Autumn Splendor and Bon Voyage). It was wonderful to be able to go to a couple of stacks and find the tons of paper I need for this. I have used most of my pattern paper from The Natural and Autumn Splendor. Having the matching cardstock was FANTASTIC. The one other paper I used is here on the front flap and the inside cover. It is Tim Holtz's Seasonal stack. Oh my goodness, I'm absolutely in love with this stack. He made one page that is all old recipe cards. It was the most perfect paper for this project. The only problem, I didn't want to cut the paper.
This is one more picture of the inside of the book. I used Winter Frolic for the sledder and snow angel.
As I was writing this post, I decided it is tough to follow exactly what I did. So, I thought I would do a step by step tutorial.
Envelopes/Outside Pages
1. Get your envelopes and measure them.
2. Split them on the side you want to insert the recipe cards. I used the right side.
3. Seal the envelopes.
4. Cover the envelope front and back. I made certain the bottom and right side was even on all of my pages. I knew the top was likely to be inside the bindng so less important to be even. I used my ATG gun to afix everything. This project used up more than 3 rolls of ATG tape.
5. Set the envelopes aside.
Recipe Cards
1. Cut out enough cards for all of your recipes. I ended up doing 20 recipes. I used manilla folders (the kind you use for filing) for my pages. You don't need anything as heavy as chip board but you could use it if you wanted.
2. Cut out your pattern paper to go over the front and back of your recipe card. Cut a space the appropriate size to insert your recipe under the pattern paper. (You could just adhere the recipe to the top of the pattern paper but I thought it looked a little more professional by creating a frame).
3. Print out your recipes and afix them to the manilla folder.
4. Afix the pattern paper to the recipes and manilla folder. Make certain to remember if you have a recipe that continues onto the back side of the recipe card.
Putting the recipe cards and envelopes together.
1. Decide which cards will go into each envelope.
2. Add photos and embellishments as your desire.
3. Place them in your desired order and create a stack with them. You will need to measure this soon.
Cover
1. Measure the outer edge of your recipe cards inside of the envelopes. Add enough size to make certain your cover is larger than your pages. This will allow the cover to protect the tabs of the pages. You could make this like a traditional word book where you can see each page but I wanted it to have a little more protection.
2. Measure the height of the stack of all of the embellished envelopes with their recipe cards inside.
3. I used two pieces of chip board for each piece of the cover and then added a piece of cardstock around that. Cut the chip board to size.
4. Cut the pattern paper 1/2 inch larger than the chip board. For the back cover, which will have a flap that goes all the way around to the front and clasps, add another 1/2 inch. This will pattern paper will be the outside cover of the book.
5. Cut a piece of coordinating paper the exact same size as the chipboard. This is the inside cover of the book.
6. Lay out your back cover, large piece, 1/4 inch, piece the height of the book, 1/4 inch, and flap. My flap was 2 inches which happened to be the same height as the book. When you adhere the paper to the chipboard, make certain you score it and leave enough room for the book to bend.
7. Choose your closure. I was very simple and used a small round piece of velcro which I adhered using zip dry. You could do any number of neat things to keep it closed. Some of the Tim Holtz closures would be very cool.
8. Using a Bind-It-All, Crop-o-dile or a hole punch, punch the holes in the cover and all of the pages. I made certain I removed the recipe cards so they didn't get punched or cut while I was punching the pages.
9. Assemble.
I hope this tutorial made it easier to understand how I did this. If you have further questions just leave me a comment and a way to get back in touch with you. I'm sorry this was so long but I hope it provided some inspiration for you. Thank you for reading and looking.
This is the cover of the book. I planned on using my Bind-It-All for the binding but in the end it was a little over 2 inches thick and no one makes the binding rings large enough. I then planned to use O-Rings but the largest size you can buy at my Office Depot or Staples is 2 inches. It was a little tight but I was able to close them. I'm working on getting 3 inch rings so it will flip easily.
Here is a picture of one of the inside pages. It is actually an envelope mini-album. I used these envelopes
The envelope measures 9.5 inches by 6.5 inches. I have a ton of them around and use them constantly. They were the perfect size for this project. It meant each recipe card could be 8.5 inches by 6.45 inches and the pages measured at exactly half of an 8.5 by 11 inch piece of paper. I slit one side of the envelope, sealed the top as though I was mailing it and then covered them.
This is one of the pages with the recipe card pulled out. I made a frame for the picture using rolling pins found on "From My Kitchen". The phone is from the same cart. All of the recipe cards are made using a box from George and welding a tab off of "From My Kitchen".
Here is another page. I used the same rolling pin but this time I used the pie from Paper Dolls (I can't remember if it is Dress Up or Everyday).
This is the envelope with the recipe card inside.
Now pulled out. You can't read it very well but I used my Cri-Kits and wrote on the frame of this page. I used the same paper for the frame so it would blend in nicely. I also used my Cri-Kits to write the name of each recipe on the tab. I then colored them in using alcohol inks.
This is the Pumpkin Pie page. I make the pumpkin "glop" for the pies (not the canned pumpkin filling) that is why it explains which pumpkins to buy when making pumpkin pies. I had an extra pie so I put it on the recipe card instead of the envelope. The pie is made using "From My Kitchen" cart. The pumpkin is from SVGCuts' Heirloom Pumpkins.
This is a long recipe so it goes onto the back of the recipe card.
Here is the back of the recipe card and the back of the envelope.
I thought this was another great page. The turkey is from Doodlecharms cart. Again, you can see the recipe card inside the envelope...
and outside the envelope.
Here you can see the pages inside the back cover. I used almost exclusively DCWV stacks for this project (The Natural, Autumn Splendor and Bon Voyage). It was wonderful to be able to go to a couple of stacks and find the tons of paper I need for this. I have used most of my pattern paper from The Natural and Autumn Splendor. Having the matching cardstock was FANTASTIC. The one other paper I used is here on the front flap and the inside cover. It is Tim Holtz's Seasonal stack. Oh my goodness, I'm absolutely in love with this stack. He made one page that is all old recipe cards. It was the most perfect paper for this project. The only problem, I didn't want to cut the paper.
This is one more picture of the inside of the book. I used Winter Frolic for the sledder and snow angel.
As I was writing this post, I decided it is tough to follow exactly what I did. So, I thought I would do a step by step tutorial.
Envelopes/Outside Pages
1. Get your envelopes and measure them.
2. Split them on the side you want to insert the recipe cards. I used the right side.
3. Seal the envelopes.
4. Cover the envelope front and back. I made certain the bottom and right side was even on all of my pages. I knew the top was likely to be inside the bindng so less important to be even. I used my ATG gun to afix everything. This project used up more than 3 rolls of ATG tape.
5. Set the envelopes aside.
Recipe Cards
1. Cut out enough cards for all of your recipes. I ended up doing 20 recipes. I used manilla folders (the kind you use for filing) for my pages. You don't need anything as heavy as chip board but you could use it if you wanted.
2. Cut out your pattern paper to go over the front and back of your recipe card. Cut a space the appropriate size to insert your recipe under the pattern paper. (You could just adhere the recipe to the top of the pattern paper but I thought it looked a little more professional by creating a frame).
3. Print out your recipes and afix them to the manilla folder.
4. Afix the pattern paper to the recipes and manilla folder. Make certain to remember if you have a recipe that continues onto the back side of the recipe card.
Putting the recipe cards and envelopes together.
1. Decide which cards will go into each envelope.
2. Add photos and embellishments as your desire.
3. Place them in your desired order and create a stack with them. You will need to measure this soon.
Cover
1. Measure the outer edge of your recipe cards inside of the envelopes. Add enough size to make certain your cover is larger than your pages. This will allow the cover to protect the tabs of the pages. You could make this like a traditional word book where you can see each page but I wanted it to have a little more protection.
2. Measure the height of the stack of all of the embellished envelopes with their recipe cards inside.
3. I used two pieces of chip board for each piece of the cover and then added a piece of cardstock around that. Cut the chip board to size.
4. Cut the pattern paper 1/2 inch larger than the chip board. For the back cover, which will have a flap that goes all the way around to the front and clasps, add another 1/2 inch. This will pattern paper will be the outside cover of the book.
5. Cut a piece of coordinating paper the exact same size as the chipboard. This is the inside cover of the book.
6. Lay out your back cover, large piece, 1/4 inch, piece the height of the book, 1/4 inch, and flap. My flap was 2 inches which happened to be the same height as the book. When you adhere the paper to the chipboard, make certain you score it and leave enough room for the book to bend.
7. Choose your closure. I was very simple and used a small round piece of velcro which I adhered using zip dry. You could do any number of neat things to keep it closed. Some of the Tim Holtz closures would be very cool.
8. Using a Bind-It-All, Crop-o-dile or a hole punch, punch the holes in the cover and all of the pages. I made certain I removed the recipe cards so they didn't get punched or cut while I was punching the pages.
9. Assemble.
I hope this tutorial made it easier to understand how I did this. If you have further questions just leave me a comment and a way to get back in touch with you. I'm sorry this was so long but I hope it provided some inspiration for you. Thank you for reading and looking.
Monday, December 27, 2010
Christmas Cards
I didn't get a chance to make many Christmas cards this year. I ended up working on a number of large project instead. Then, there were lots and lots of baked goodies. Anyway, it just didn't happen this year. I'm thinking about doing a ton of them early in the new year so I'm ready for next year.
This card was made fairly quickly but I love it. I used some acetate (I have a ton of it from all of the packaging around my house and I never seem to work it out to use it.) to attach the snowy house to the card. This next picture shows the card straight through. I used rock candy stickles on the snow covered roof and the ground. The oval frame was a freebie from SVGCuts. Isn't it lovely.
I placed the acetate between the top of the card and the next layer.
When I designed this card in my head, I embossed the card topper and then put the oval frame around it. However, when I put the frame around the oval with the embossing, it was just too much.
So, I made two cards. Each is very different but uses the same basic cuts.
I love this Tim Holtz embossing folder. I ran the card topper through twice, once for each end of the card. The card topper is 1/2 inch smaller than the card base. Again, I cut an oval in the base and the card topper and put a piece of acetate between the two in order to afix the snowy house onto the card.
Here is the card opened up so you can see through the card.
I tried to get a closer view of the embossing but I couldn't get a crisp clear picture of it.
I hope you enjoyed my Christmas cards and had yourself a wonderful holiday. I'm trying to finish one big project which I hope to be able to share in the next day or so. Stay warm and safe and happy crafting.
This card was made fairly quickly but I love it. I used some acetate (I have a ton of it from all of the packaging around my house and I never seem to work it out to use it.) to attach the snowy house to the card. This next picture shows the card straight through. I used rock candy stickles on the snow covered roof and the ground. The oval frame was a freebie from SVGCuts. Isn't it lovely.
I placed the acetate between the top of the card and the next layer.
When I designed this card in my head, I embossed the card topper and then put the oval frame around it. However, when I put the frame around the oval with the embossing, it was just too much.
So, I made two cards. Each is very different but uses the same basic cuts.
I love this Tim Holtz embossing folder. I ran the card topper through twice, once for each end of the card. The card topper is 1/2 inch smaller than the card base. Again, I cut an oval in the base and the card topper and put a piece of acetate between the two in order to afix the snowy house onto the card.
Here is the card opened up so you can see through the card.
I tried to get a closer view of the embossing but I couldn't get a crisp clear picture of it.
I hope you enjoyed my Christmas cards and had yourself a wonderful holiday. I'm trying to finish one big project which I hope to be able to share in the next day or so. Stay warm and safe and happy crafting.
Thursday, December 23, 2010
Calendar - Part 2
This is part 2 of my Calendar project. If you missed the first post, I suggest going back. It discusses all of the great features of Designer's Calendar. You can find the post here.
Now, my regular readers know how much I love my carts. I have lots of them and find them to make things easier for me. However, I also love my SCAL. It gives me additional options. Today I'm going to show a couple of pages I made using SCAL. I bought some items from SVGCuts and Lettering Delights. For those people that missed it, Lettering Delights is now selling SVG files ready to cut. I've been using their clip art and doodlebats and preparing them for cutting myself.
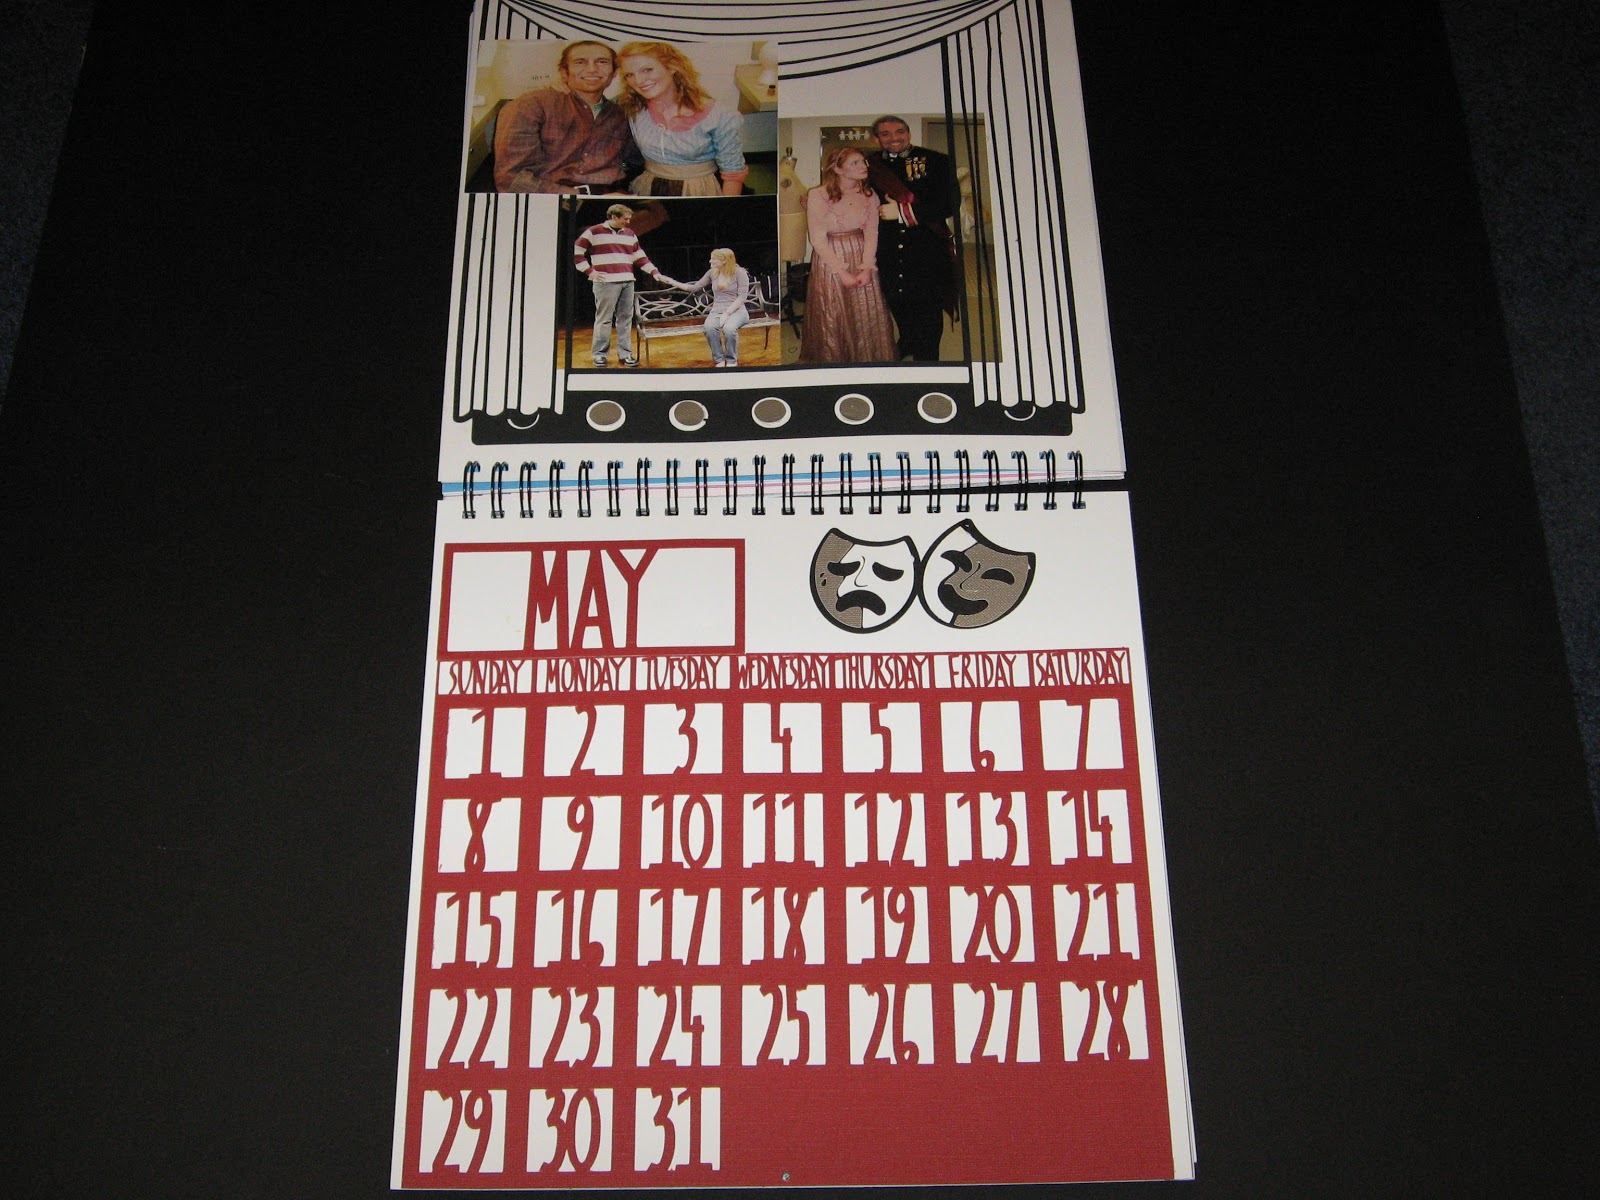
This page was made from a set called Lights, Camera, Action. I bought the set over the summer but haven't had a chance to cut it until this week. I did very little to change it in order to cut. I took out about half of the lines on the stage and I moved the parts of the mask (already divided) so that I could cut them in different colors.
Here is a better picture of the stage. I also cut the lights separately in silver to give it a little bit of texture. It is very delicate but I thought it made a great frame (even if I had more pictures than it would hold).
Don't you love the masks? I think they came out fantastic. This is an example of why I love having SCAL. It allows me to cut things that Provo Craft isn't likely to ever create. They have some fantastic things but I love the flexibility of creating things in my imagination.
I made this page using SVGCuts' Serene Leaves and 3D Fall Cards. My picture doesn't properly show the the frame on the bottom card. It has oak leaves going up the side of the card. The ribbon comes from Ribbon and Bows Oh My. I purchased one of their Convenience Packs after Okie Ladybug was raving about how great they are. I must admit, I think she is correct.
This picture didn't come out very good. It looks like it has the measels but those are actually little leaves. I love this paper (DCWV Amber Autumn Stack) but it is almost impossible to cut it using my Cricut. Some of the leaves are glittered, some are embossed and some are a flat imprint. It makes it gorgeous but it causes so much grief for the cutter. I ended up cutting this 4 times (twice with a brand new blade) and it still wouldn't cut cleanly. However, I LOVED all of the matching cardstock. I think all four or five colors were in the pack. And even with all of those options I ended up using some of the patterned papers that coordinated for the orange leaves.
Both of these frames came from SVGCuts. I believe at least one was free (maybe both). If you are on their email list they email you a link for a free cut file at least once a week and maybe twice. Many of them are one cut from some of the files they sell.
The frame on this one is from SVGCuts also. The paper is from Paper Studio's A Country Christmas. It has the cardstock and pattern paper in the same stack. I decided to use some different techniques on this page. I used Rock Candy Crackle Paint on the snowmen and Glossy Accents on some of the snow flakes to give them a bit of shimmer. The snowflake brads are also from Paper Studio.
I used some snowflake stamps to give the white paper a little more interest. I initially cut the calendar as a test cut but then I decided to use it since it worked.
I hope you have enjoyed this project. I was able to finish it in less than a week (I didn't have much of a choice, we were exchanging gifts a couple of days ago) but a few of the pages are lacking because of the speed. If anyone can help me with a way to share the cut files, I would be happy to load them up and offer them to anyone wanting to make a 2011 calendar.
Enjoy, I'm hoping to be able to post a couple of additional projects before Christmas.
Now, my regular readers know how much I love my carts. I have lots of them and find them to make things easier for me. However, I also love my SCAL. It gives me additional options. Today I'm going to show a couple of pages I made using SCAL. I bought some items from SVGCuts and Lettering Delights. For those people that missed it, Lettering Delights is now selling SVG files ready to cut. I've been using their clip art and doodlebats and preparing them for cutting myself.
This page was made from a set called Lights, Camera, Action. I bought the set over the summer but haven't had a chance to cut it until this week. I did very little to change it in order to cut. I took out about half of the lines on the stage and I moved the parts of the mask (already divided) so that I could cut them in different colors.
Here is a better picture of the stage. I also cut the lights separately in silver to give it a little bit of texture. It is very delicate but I thought it made a great frame (even if I had more pictures than it would hold).
Don't you love the masks? I think they came out fantastic. This is an example of why I love having SCAL. It allows me to cut things that Provo Craft isn't likely to ever create. They have some fantastic things but I love the flexibility of creating things in my imagination.
I made this page using SVGCuts' Serene Leaves and 3D Fall Cards. My picture doesn't properly show the the frame on the bottom card. It has oak leaves going up the side of the card. The ribbon comes from Ribbon and Bows Oh My. I purchased one of their Convenience Packs after Okie Ladybug was raving about how great they are. I must admit, I think she is correct.
This picture didn't come out very good. It looks like it has the measels but those are actually little leaves. I love this paper (DCWV Amber Autumn Stack) but it is almost impossible to cut it using my Cricut. Some of the leaves are glittered, some are embossed and some are a flat imprint. It makes it gorgeous but it causes so much grief for the cutter. I ended up cutting this 4 times (twice with a brand new blade) and it still wouldn't cut cleanly. However, I LOVED all of the matching cardstock. I think all four or five colors were in the pack. And even with all of those options I ended up using some of the patterned papers that coordinated for the orange leaves.
Both of these frames came from SVGCuts. I believe at least one was free (maybe both). If you are on their email list they email you a link for a free cut file at least once a week and maybe twice. Many of them are one cut from some of the files they sell.
The frame on this one is from SVGCuts also. The paper is from Paper Studio's A Country Christmas. It has the cardstock and pattern paper in the same stack. I decided to use some different techniques on this page. I used Rock Candy Crackle Paint on the snowmen and Glossy Accents on some of the snow flakes to give them a bit of shimmer. The snowflake brads are also from Paper Studio.
I used some snowflake stamps to give the white paper a little more interest. I initially cut the calendar as a test cut but then I decided to use it since it worked.
I hope you have enjoyed this project. I was able to finish it in less than a week (I didn't have much of a choice, we were exchanging gifts a couple of days ago) but a few of the pages are lacking because of the speed. If anyone can help me with a way to share the cut files, I would be happy to load them up and offer them to anyone wanting to make a 2011 calendar.
Enjoy, I'm hoping to be able to post a couple of additional projects before Christmas.
Subscribe to:
Posts (Atom)