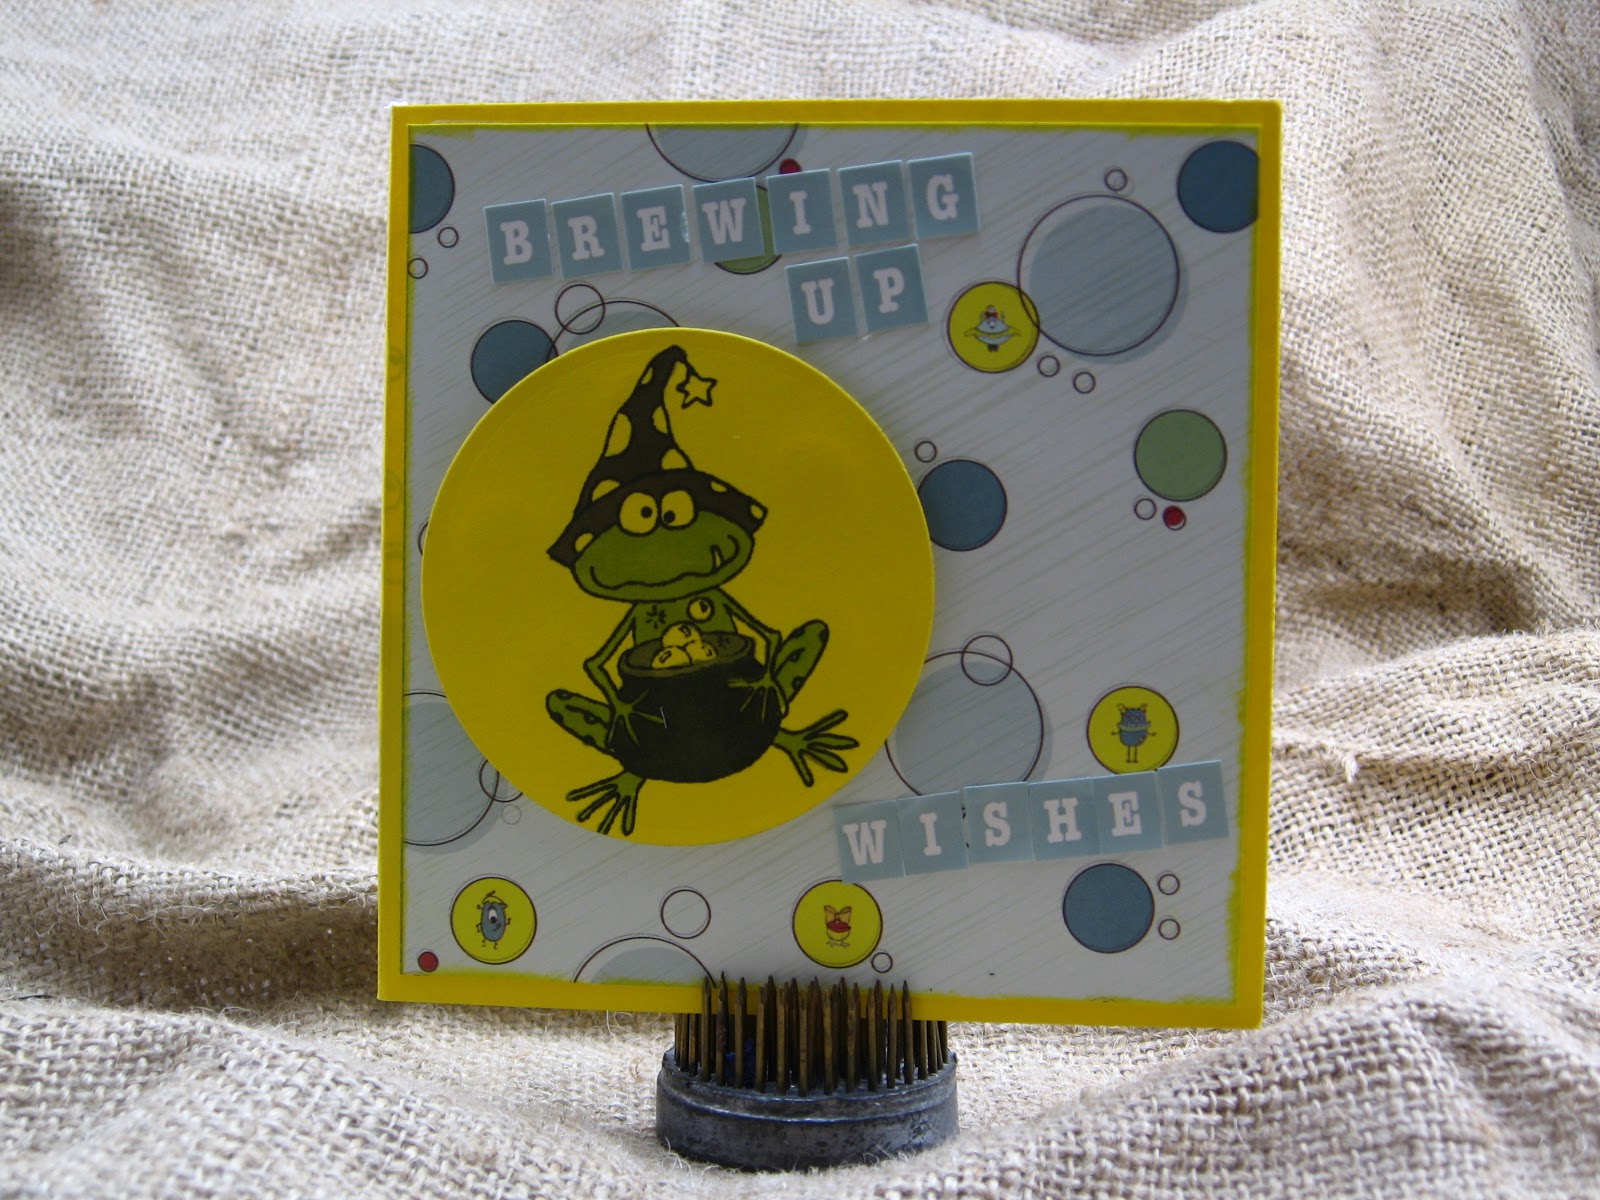
Hello Friends -
It feels like I've been away from Humbug Hall for far too long (it just the difference between getting DT items in and squeaking in at the end of the challenge). I almost missed the deadline but then I saw the incredible creation by Popsicle Toes. While it reminded me I needed to get my cards photographed and all, I almost chucked them once I saw Donna's deliciousness. Oh my, she calls it a quick and easy card. My mind doesn't even get to the point of making such yumminess.
Anyway, enough blathering. Here are my cards. They all use digis from Di's Digis which can be found here.
This one is my favorite. The paper is perfect, a lovely blue with snowmen all over it. I also thought the sentiment worked well. It is from Fiskar's Season's Greetings. It is one of the new ones.
This one has a little bling. I used some of my Martha Stewart Christmas paper. It is a nice bright red. I've been in a mood to use that paper this week.
Finally, another version of the Snowman and Penguin hugging.
This sentiment is from Unity Stamps and Jillibean Soup. You really can't go wrong when you combine those two. And, did you know Jillibean Soup has started selling digis? Oh my, I can't wait to play with those.
OK, back to my Advent Calendars. I'm hoping to be able to show a few of them this week.
Showing posts with label card. Show all posts
Thursday, November 10, 2011
Monday, November 7, 2011
Bugaboos for Crafty Hazelnut's Challenge
Hello Friends -
I have two cards for you today. They are VERY similar but just slightly different. Can you find the differences?
and here is the second card.
I must admit, this is going to be a quick post. Those are all the pictures I have for you today. As for the details, the images are freebies from Jodi over at Bugaboo Stamps. One of the things I love about the simpler images, my coloring doesn't need to be as sophisticated. I'm just not that good at the layering and shading and all that.
Here is the link for the AKVs. I'm not certain they are in there (I think these were special for Facebook Friends or newsletter recipients). Don't forget to tell Jodi how much you like them.
The paper is from a Martha Stewart Christmas pack that I bought last year.
I am entering these in the Crafty Hazelnut's Christmas Challenge blog (she was looking for something with bright colors) and the Catch the Bug Anything Goes Challenge.
Friday, October 28, 2011
Bah Humbug Die Cuts
Hello Friends -
This is my last week as a guest designer at Bah! Humbug! Challenges. I am very sad to leave the lovely ladies of the manor but I hope you will join in some of their challenges. It is a wonderful way to get ready for the holidays without trying to get all of your cards done at the last minute.
Today's challenge is die cuts. I must admit, this one was tough because the possibilities seemed endless. I could cut with my cuttlebug. I could cut with my electronic cutter. What to do? What to do?
So, I decided to do one of each (I was shooting for two but it just didn't happen). The first one is an ornament shape card. I made it using a Lettering Delights simple shape and Sure Cuts a Lot. I'm disappointed in the way the photo came out. In person it is all sparkly and fun.
Then I made this simple shaped card using my cuttlebug and a round Spellbinders die. I think I learned this technique on BBTB2. To make the base you fold your cardstock in half and then place it in the die just a little bit off. This way it doesn't cut through the top of the card. Then I used the next smaller die to cut out the cute Tiddly Inks image. I can't find him in the Tiddly Inks store right now but I'm certain he is there somewhere.
Finally, I made this side step card. I used the tutorial at Split Coast Stamper. I must say, whenever I'm looking for a tutorial on how to make a card, I find they are likely to have it and all of their tutorials have been easy to follow. I used my electronic cutter to make this card. All of the images are from Cricut carts, Child's Year, Celebrations and Joy of the Seasons.
I hope you like the die cut cards and a huge thank you to the ladies of the manor.
This is my last week as a guest designer at Bah! Humbug! Challenges. I am very sad to leave the lovely ladies of the manor but I hope you will join in some of their challenges. It is a wonderful way to get ready for the holidays without trying to get all of your cards done at the last minute.
Today's challenge is die cuts. I must admit, this one was tough because the possibilities seemed endless. I could cut with my cuttlebug. I could cut with my electronic cutter. What to do? What to do?
So, I decided to do one of each (I was shooting for two but it just didn't happen). The first one is an ornament shape card. I made it using a Lettering Delights simple shape and Sure Cuts a Lot. I'm disappointed in the way the photo came out. In person it is all sparkly and fun.
Then I made this simple shaped card using my cuttlebug and a round Spellbinders die. I think I learned this technique on BBTB2. To make the base you fold your cardstock in half and then place it in the die just a little bit off. This way it doesn't cut through the top of the card. Then I used the next smaller die to cut out the cute Tiddly Inks image. I can't find him in the Tiddly Inks store right now but I'm certain he is there somewhere.
Finally, I made this side step card. I used the tutorial at Split Coast Stamper. I must say, whenever I'm looking for a tutorial on how to make a card, I find they are likely to have it and all of their tutorials have been easy to follow. I used my electronic cutter to make this card. All of the images are from Cricut carts, Child's Year, Celebrations and Joy of the Seasons.
I hope you like the die cut cards and a huge thank you to the ladies of the manor.
Sunday, October 23, 2011
Inky Antics Honey Comb cards
Hello Friends -
I have a couple of quick cards today and they AREN'T for a challenge or a Design Team or anything else. They are just because I made them and I thought I would share.
This card is for the Wonderkid. He has been sending cards to everyone he knows recently (I think he single-handly plans on saving the US Postal Service). It is so sweet to watch him color a picture, and write a message and then he gives them to me to put the "card hoppers" on the card base and he signs them and sticks them in an envelope.
So, I decided to make him a card. Have you ever used the Honey POP from Inky Antics? I have a bunch of it that I bought when it was all the rage, about a year ago. I hadn't really used it but I thought it would be great for children's cards. You can find the Honey POP here (scroll to the bottom of the page) and they list the stamps they sell to use with it on the same page.
And here is the inside. I'm normally not one for using all of the stamps in a set on one card but these seem to beg for more and more of them.
A bit of a closer view.
I'm still working out exactly how to get the bits and pieces to work with the honeycomb paper.
Here is the birthday card I made for one of the Wonderkid's classmates.
It isn't the best coloring in the world but the little one didn't mind too much.
I like the way the cake stand worked out but the candle ended up just a bit high. I need to work on that before I make another one.
So, have you ever used this honeycomb paper? What do you think of the cards?
I have a couple of quick cards today and they AREN'T for a challenge or a Design Team or anything else. They are just because I made them and I thought I would share.
This card is for the Wonderkid. He has been sending cards to everyone he knows recently (I think he single-handly plans on saving the US Postal Service). It is so sweet to watch him color a picture, and write a message and then he gives them to me to put the "card hoppers" on the card base and he signs them and sticks them in an envelope.
So, I decided to make him a card. Have you ever used the Honey POP from Inky Antics? I have a bunch of it that I bought when it was all the rage, about a year ago. I hadn't really used it but I thought it would be great for children's cards. You can find the Honey POP here (scroll to the bottom of the page) and they list the stamps they sell to use with it on the same page.
And here is the inside. I'm normally not one for using all of the stamps in a set on one card but these seem to beg for more and more of them.
A bit of a closer view.
I'm still working out exactly how to get the bits and pieces to work with the honeycomb paper.
Here is the birthday card I made for one of the Wonderkid's classmates.
It isn't the best coloring in the world but the little one didn't mind too much.
I like the way the cake stand worked out but the candle ended up just a bit high. I need to work on that before I make another one.
So, have you ever used this honeycomb paper? What do you think of the cards?
Sunday, October 9, 2011
Birthday Cards
Hello Friends -
I wanted to pop in with a birthday card I made (actually I made 20 of these to be sent from some teachers to all their students).
The candle is from the Cricut Elmo's Party cartridge. It has an optional face (which wasn't the look I was going for on this card). I designed the background paper in a Subway Art style using MS Word. Here is a screenshot of the Word doc.
As you can see on the left, each box has Happy Birthday in a different language. I found the easiest way to do this is to build the Subway Art from the top down. If you try to place the text boxes at different times it becomes a mess and doesn't work nearly as well. I love the way this turned out and will probably use it for all birthday cards in different colors. Using MS Word I can change the colors to any that I choose.
Here is a pile of the cards (about 3/4 of the final run). I ran out of purple paper before I could finish them (don't you hate when that happens). You would think with the amount of paper I have around here that I would never have that problem but it still sneaks up on me. Oh well, that is what coupons are for.
I'm hoping to have a few more projects to show this week. I'm working on a couple of design team projects which are so exciting and I can't wait to share. I also have a bunch of projects for the Wonderkid's Fall festival. We are making masks and I need to do some baked goods for the bake sale and cake walk. I'm hoping to get enough done so I can actually try to do a cake. We'll see how this week treats me. I may be toast by the time Sunday rolls back around.
I wanted to pop in with a birthday card I made (actually I made 20 of these to be sent from some teachers to all their students).
The candle is from the Cricut Elmo's Party cartridge. It has an optional face (which wasn't the look I was going for on this card). I designed the background paper in a Subway Art style using MS Word. Here is a screenshot of the Word doc.
As you can see on the left, each box has Happy Birthday in a different language. I found the easiest way to do this is to build the Subway Art from the top down. If you try to place the text boxes at different times it becomes a mess and doesn't work nearly as well. I love the way this turned out and will probably use it for all birthday cards in different colors. Using MS Word I can change the colors to any that I choose.
Here is a pile of the cards (about 3/4 of the final run). I ran out of purple paper before I could finish them (don't you hate when that happens). You would think with the amount of paper I have around here that I would never have that problem but it still sneaks up on me. Oh well, that is what coupons are for.
I'm hoping to have a few more projects to show this week. I'm working on a couple of design team projects which are so exciting and I can't wait to share. I also have a bunch of projects for the Wonderkid's Fall festival. We are making masks and I need to do some baked goods for the bake sale and cake walk. I'm hoping to get enough done so I can actually try to do a cake. We'll see how this week treats me. I may be toast by the time Sunday rolls back around.
Friday, October 7, 2011
All that Glitters
Hello Friends -
Today is my first day of guest designing with the wonderful ladies at Humbug Hall. One of the reasons I love their challenge site is they always come up with interesting little twists. This week was no exception. They challenged us to use... Glitter. Have I mentioned how much I HATE glitter. I tend to ban it from my craft room. It truly doesn't matter what you do, you end up with glitter EVERYWHERE.
So, when I first read the request for glitter, after I stopped shuttering, I immediately thought of these lovely glass bulbs. The idea of trapping all that glitter inside the bulb appealed to me. These have been all the rage for a few years now. My twist this time, the flattened bulb. Isn't it wonderful? It is also so much easier to put vinyl on something that isn't completely round.
I'm not much on housework so it took some doing to find the floor polish. Eventually, I located the correct aisle in my grocery and then the correct polish. For those on my side of the pond, you use Pledge with Future Shine. If you are on the other side of the pond, or down under, I've been told you can use any floor polish that gets a bit sticky as it dries.
Here is a video on how to make these little buggers. There are tutorials all over the web if you need more info but they are easy and a ton of fun. I made them last year with a dozen little children. They loved it, the ornaments came out wonderful and the glitter stayed away from my house.
Here are a couple more pictures of the Christmas ornaments.
I love being able to make something a little more personal. This is one that I thought I could send to my cousins for their baby's first Christmas.
I put the year on the back for them.
I love the look of this one. The green on that sparkly red. Isn't it yummy?
For everyone looking for their card fix, I have two more little projects. The first was inspired by a lovely lady over at Mod Paperie. Theinly has some of the most incredible creations. She recently introduced me to a new site called idiecut.com. They have some wonderful SVGs to be used in your electonic cutting machines. This little guy was so cute, I couldn't resist trying.
I like Theinly's take on him better than mine but I thought he was fun and he has a bright glittery nose. I ran his antlers through my cuttlebug with a Tim Holtz embossing folder, the wood grain one. I thought it gave a bit of added fun. Instead of messing around with two little itty bitty eyes, I used a couple of gems. It was a lot easier and gave him some dimension.
Finally, the best glitter in my book, Stickles. It doesn't get away from you, you don't really need to be fast to keep it from spilling and it comes in many yummy colors. I used my Cuttlebug on this card also. This time it was a holiday folder from Cricut. I thought it would be fun to carry the Christmas trees over from the embossing folder, to cutting them out (the basic Christmas shapes that came with SCAL had the perfect tree once I stretched it) and even placing them on the tag.
I made the tag by using the path feature in SCAL and then printing instead of cutting. I'm trying to teach myself to write on a path using MS Word or some other program but I haven't worked it out. This seems to be doing the job so far.
I recommend hopping over to Humbug Hall for a look at the lovely creations by Ann, Max and Brenda. They have been having crazy weather while here in the South (that is the US South) we have had the most incredibly beautiful weather. It is making it tough to stay indoors and work or craft. We only have about two weeks every year when you can have the windows open and enjoy the great outdoors (in between it being so hot and humid that you practically drink the air and so chilly and rainy that you want to bundle next to the heater). So, the Wonderkid and I have been having a nice time out of doors. Hopefully you are having more of my weather than the Baltic wing of Humbug Hall.
I'll see you tomorrow for some more fun.
Today is my first day of guest designing with the wonderful ladies at Humbug Hall. One of the reasons I love their challenge site is they always come up with interesting little twists. This week was no exception. They challenged us to use... Glitter. Have I mentioned how much I HATE glitter. I tend to ban it from my craft room. It truly doesn't matter what you do, you end up with glitter EVERYWHERE.
So, when I first read the request for glitter, after I stopped shuttering, I immediately thought of these lovely glass bulbs. The idea of trapping all that glitter inside the bulb appealed to me. These have been all the rage for a few years now. My twist this time, the flattened bulb. Isn't it wonderful? It is also so much easier to put vinyl on something that isn't completely round.
Here is a video on how to make these little buggers. There are tutorials all over the web if you need more info but they are easy and a ton of fun. I made them last year with a dozen little children. They loved it, the ornaments came out wonderful and the glitter stayed away from my house.
Here are a couple more pictures of the Christmas ornaments.
I love being able to make something a little more personal. This is one that I thought I could send to my cousins for their baby's first Christmas.
I put the year on the back for them.
I love the look of this one. The green on that sparkly red. Isn't it yummy?
For everyone looking for their card fix, I have two more little projects. The first was inspired by a lovely lady over at Mod Paperie. Theinly has some of the most incredible creations. She recently introduced me to a new site called idiecut.com. They have some wonderful SVGs to be used in your electonic cutting machines. This little guy was so cute, I couldn't resist trying.
I like Theinly's take on him better than mine but I thought he was fun and he has a bright glittery nose. I ran his antlers through my cuttlebug with a Tim Holtz embossing folder, the wood grain one. I thought it gave a bit of added fun. Instead of messing around with two little itty bitty eyes, I used a couple of gems. It was a lot easier and gave him some dimension.
Finally, the best glitter in my book, Stickles. It doesn't get away from you, you don't really need to be fast to keep it from spilling and it comes in many yummy colors. I used my Cuttlebug on this card also. This time it was a holiday folder from Cricut. I thought it would be fun to carry the Christmas trees over from the embossing folder, to cutting them out (the basic Christmas shapes that came with SCAL had the perfect tree once I stretched it) and even placing them on the tag.
I made the tag by using the path feature in SCAL and then printing instead of cutting. I'm trying to teach myself to write on a path using MS Word or some other program but I haven't worked it out. This seems to be doing the job so far.
I recommend hopping over to Humbug Hall for a look at the lovely creations by Ann, Max and Brenda. They have been having crazy weather while here in the South (that is the US South) we have had the most incredibly beautiful weather. It is making it tough to stay indoors and work or craft. We only have about two weeks every year when you can have the windows open and enjoy the great outdoors (in between it being so hot and humid that you practically drink the air and so chilly and rainy that you want to bundle next to the heater). So, the Wonderkid and I have been having a nice time out of doors. Hopefully you are having more of my weather than the Baltic wing of Humbug Hall.
I'll see you tomorrow for some more fun.
Monday, September 5, 2011
Tiddly Inks Card
Hello Friends -
I'm back, not with the project I planned to show today but I'm back.
Today I have a card for one of my nieces. It also is for the Tiddly Inks challenge -- Reading Fun. I chose School Girl with School House. The card is 5 x 7 inches. The colored cardstock is from Core'dinations.
I pop dotted School Girl to give it a bit more dimension and add to the perspective. I'm pleased with the way she turned out. I feel like I'm getting a little better at adding dimension to hair. She still needs a little something but I see some progress.
Here is School Girl, a bit closer.
What do you think of the hair? Now, if I could just work out the shading on her face. I would really be on a roll.
It is funny, when I was growing up EVERYONE started school the day after Labor Day. We went to the Great Geauga County Fair over the long weekend, saw friends, ate fair food and then started school. I didn't know anyone that started school on a day other than the one after Labor Day. It was that way for as long as I knew and all the way through school. Now, the Wonderkid has been in school for two weeks, already. Many of the schools in our area have been in for a month. So, Labor Day doesn't have that same end of the summer feel. Add to that, we live in the South and we'll be wearing shorts for another 6 weeks and could be swimming for a month.
It certainly changes the way I think about the holiday. It was a nice day off, I think about the meaning of the holiday, thank everyone that fought to bring us the 40 hour work week (when we can still get it) and the weekend.
So, Happy Labor Day, Y'all.
Sunday, September 4, 2011
Bugaboo Voices Card
Hello Friends -
I have another fun card today from the digis at Bugaboo Stamps. This one is going to my cousin who has been a bit ill. I think she is going to giggle up a storm over this one.
I used Tim Holtz's Pattern & Stitches Texture Fades. I love this set and haven't used it nearly as much as I would like. The blue base is Core'dinations and the digi is cut out using the Deckled Edges Nestability.
Here is the sentiment.
What do you think of the card? Do you think she'll like it?
Can you tell the Wonderkid has been back in school for a week and a half? I've been busy (Thursday found me painting the pantry before I put all of the food back in and organized it.) but I still feel like some of my time is "my own". I've noticed the Wonderkid is willing to play by himself a bit more after a day with all of his friends.
So, I am hoping to get back into the swing of the blog. I have a ton of things to show but I need to take the time to prep the pictures and write up the posts. I also have a list of projects about a mile long.
I have another fun card today from the digis at Bugaboo Stamps. This one is going to my cousin who has been a bit ill. I think she is going to giggle up a storm over this one.
Here is the sentiment.
What do you think of the card? Do you think she'll like it?
Can you tell the Wonderkid has been back in school for a week and a half? I've been busy (Thursday found me painting the pantry before I put all of the food back in and organized it.) but I still feel like some of my time is "my own". I've noticed the Wonderkid is willing to play by himself a bit more after a day with all of his friends.
So, I am hoping to get back into the swing of the blog. I have a ton of things to show but I need to take the time to prep the pictures and write up the posts. I also have a list of projects about a mile long.
Wednesday, August 31, 2011
Bah Humbug For The Girls
Hello Friends --
I am back with another Christmas card for the Bah Humbug challenge. This one was fun. I knew what I wanted to do right away, I just needed to find the time to get it done. So, in classic fashion, I'm sneaking in the night before this is "due".
The challenge was to make a card "For The Girls". You could interpret that in many different ways. I thought this image from Bugaboo Stamps was perfect. You can find a ton of fun/funny characters in the Bugaboo collection. This one is called Scarlette Cafe and can be found here.
The sentiment actually goes with another digi but I thought she looked like she wants Santa's naughty boy list. What do you think? Would Scarlette have a good time with Santa's list of naughty boys?
I used my Curved Rectangles Nestie for the image and the backing. I pop dotted both of them to give it all a bit of dimension. The sad thing, it looked a bit plain that way so I pulled out some letter stamps from the Teresa Collins Blingage Alphabets and made a pattern of HO HO HO. I probably should find some smaller letters next time (I think I'll be doing quite a few of this design).
Now, for a funny story. This week the Wonderkid had to go to the dentist to get two cavities filled. How can a 4 year old have cavities? Well, according to the dentist it actually didn't have anything to do with his eating or brushing and had everything to do with the enamel on his teeth never quite coming in.
So, while we are waiting for the teeth to "go to sleep". One of the hygienists comes by and says, "Did he see him?" Meaning the Wonderkid see someone. Well, I had no idea what she was talking about so she encourages us to look out and who is standing at the check out desk but SANTA. I mean honest to goodness Santa. He wasn't wearing the suit and boots but he had the belly and the long white hair and the beard. Well, the Wonderkid thought that was pretty cool so we talked to him for a minute. Santa told him that he comes to our dentist because he is very good and doesn't ever hurt you and he is one of the best. When asked why he doesn't go to the elf dentist he said that elf is very busy taking care of the other elves' teeth and he taught our dentist how to be a dentist. Santa then explained that since he is 400 years old he needs to take very good care of his teeth.
Finally, the Wonderkid looks at me and says, "Can I tell him what I want for Christmas?" I said, "yes" and he proceeded to explain he wants a skateboard. Santa didn't miss a beat. He said he would bring him one but he needs to promise to wear his helmet and knee/elbow pads.
The Wonderkid has been telling everyone who he saw at the dentist's office. He doesn't mention the cavities being filled or any of the other parts, just that he was able to see Santa.
Thanks for stopping over. I hope to see you again soon. I've a number of projects to share but I just can't seem to get past the laundry, recycling, dishes, cabinets that need cleaning and now painting, etc. Maybe tomorrow will be better.
Tuesday, July 19, 2011
Bugaboo Joy Christmas Card
Hello Friends -
Merry Christmas in July. I'm sure most of you aren't too surprised to see another Christmas Card but you may be sick of them very soon. My pals over at Bugaboo Stamps are celebrating Christmas in July with a week long challenge (the challenge site is Catch The Bug). This one is a card with non-traditional colors. I thought brown was something I could work with and would be non-traditional.
The digi stamp can be found here.
I decided this needed a unique fold so I made a "Joy Card". I don't know why it is called a Joy Fold but there you go. You can find a tutorial on making this card here on the Splitcoast Stamper site. It seemed appropo to use a Joy Fold with the Joy stamp.
Here it is completely open.
I used my iTop to make the brad. I'm not entirely in love with the way it came out (it seems a bit wonky) but I like the concept. I may go back and redo the brad.
The paper is from the Tim Holtz Seasonal stack. I fussy cut out the page of music for Joy to the World. Then I used one of my Tim Holtz Sizzix texture fades with music. I was in quite a mood to do things up the Tim Holtz way. I also swiped some Distress Inks over the embossing, the edges of the pattern paper and the edges of the card base.
What do you think? Is the digi image lost with all the other music "stuff" or does it come together with the "Joy" theme? As long as life doesn't get in the way, I should be back soon with some more Christmas cards.
Merry Christmas in July. I'm sure most of you aren't too surprised to see another Christmas Card but you may be sick of them very soon. My pals over at Bugaboo Stamps are celebrating Christmas in July with a week long challenge (the challenge site is Catch The Bug). This one is a card with non-traditional colors. I thought brown was something I could work with and would be non-traditional.
The digi stamp can be found here.
I decided this needed a unique fold so I made a "Joy Card". I don't know why it is called a Joy Fold but there you go. You can find a tutorial on making this card here on the Splitcoast Stamper site. It seemed appropo to use a Joy Fold with the Joy stamp.
Here it is completely open.
I used my iTop to make the brad. I'm not entirely in love with the way it came out (it seems a bit wonky) but I like the concept. I may go back and redo the brad.
The paper is from the Tim Holtz Seasonal stack. I fussy cut out the page of music for Joy to the World. Then I used one of my Tim Holtz Sizzix texture fades with music. I was in quite a mood to do things up the Tim Holtz way. I also swiped some Distress Inks over the embossing, the edges of the pattern paper and the edges of the card base.
What do you think? Is the digi image lost with all the other music "stuff" or does it come together with the "Joy" theme? As long as life doesn't get in the way, I should be back soon with some more Christmas cards.
Thursday, June 30, 2011
Bah Humbug Penguin Card
Hello Friends -
I have a quick card and a quick post. I wanted to join the fun with the ladies at Humbug Hall (they challenged us to make a Christmas project with penguins) but I've got a sick kiddo on my hands (I'm wracked with guilt right now because I'm worried I may have given the Wonderkid food poisoning or something similar. He is sick, I'm sick and neither of us have knowingly been near any sick people. What kind of Mommy could I be if I didn't prepare his food well. The only thing I can come up with is not washing the cherries he ate at dinner. I don't eat meat so it can't be salmonella.)
OK, quickly on to this card so I can go to sleep.
I found a wonderful set of penguin digis from Di's Digis. You can find her work here. I picked up a few because the Wonderkid's new school class is the Penguins (last year he was a Bear). I thought these might come in handy around the holidays.
I turned the card into a shape card using my circle Nestabilities. I learned this technique from the folks over at Tiddly Inks and I'm in love with it.
I added some glossy accents to the Christmas bulbs and the hat. I pop dotted the image and that is it. A simple, humble offering to the lovely ladies of Humbug Hall. Max and Ann, I hope it will meet with your approval and I'm so pleased to be playing with you all again.
Thursday, May 19, 2011
Bah Humbug Snowflake Spinner Card
Well, the lovely ladies of Humbug Hall gave us a new challenge this week. In classic form, I'm getting it done just before the deadline. It is a fairly easy challenge (snowflakes) so I wanted to add a bit of a twist. I hope you have fun with this little card, I know I did.
It is a spinner card. I found some wonderful directions for making this at Splitcoast Stampers. I think I've mentioned it is my go to site for tutorials on all things fun in cards.
Here is a shot of the snowflake at the bottom of the spinner.
The sentiment is computer generated. The blue cardstock is Core'dinations, the snowflake is an SVG from SVGCuts and the debossing is a folder from Sizzix.
Finally, I decided to try something new. I did a VERY short video of the card because I'm amazed at how quickly this thing can get going. I used two pennies (hopefully the Wonderkid won't notice that a "borrowed" them). I wanted to see how easy/tough it is to upload to Blogger and I wanted to see what would work and wouldn't. I didn't add sound to it because it is short (about 20 seconds) I thought you could watch without a soundtrack.
It is a spinner card. I found some wonderful directions for making this at Splitcoast Stampers. I think I've mentioned it is my go to site for tutorials on all things fun in cards.
Here is a shot of the snowflake at the bottom of the spinner.
The sentiment is computer generated. The blue cardstock is Core'dinations, the snowflake is an SVG from SVGCuts and the debossing is a folder from Sizzix.
Finally, I decided to try something new. I did a VERY short video of the card because I'm amazed at how quickly this thing can get going. I used two pennies (hopefully the Wonderkid won't notice that a "borrowed" them). I wanted to see how easy/tough it is to upload to Blogger and I wanted to see what would work and wouldn't. I didn't add sound to it because it is short (about 20 seconds) I thought you could watch without a soundtrack.
Sunday, May 15, 2011
Papercraft Star Challenge
This card was way outside my comfort zone. The Papercraft Star challenge is something metal or a button (I have three green metal flower brads), either a stamp or a die cut (I have the stamped sentiment) and at least two patterned papers. Then there was an inspiration photo. This is the photo.
When I was looking for papers I was picturing the red/pink color as much more pink. I still think it uses the picture as inspiration (especially for me given my comfort zone is as far away from pink as you can get.)
Here is a close up of the brads and the pink flower pattern paper (from ki memories -- Friendship stack).
The brads are from my pals at Creative Charms, as is the big green heart.
The Wonderkid has already laid claim to this card. He "helped" me put it together.
Tuesday, May 10, 2011
Strawberries
I had a plan for a wonderful post today. I headed down to the Georgia Farmer's Market (this is one of those huge events with hundreds of farmers from across the state coming to sell to all of the restaurants and grocery stores in the Atlanta area) with the plan to purchase and photograph all the lovely strawberries.
Then I was planning to take a picture similar to this:
and then I was going to bring my strawberries home and start making Strawberry Vanilla Jam and I was going to take pictures while I made the jam and then I would have posted those. Here is an older posts of my watermelon pickles.
HOWEVER...
When I arrived at the Farmer's Market today they had NO, absolutely NO strawberries. So, that messed up my entire post. But... I still had my card for the Tiddly Inks blog hop.
So, here you go...
It took me three different photograph sessions to get one shot that I liked. The image is called Minnie Berry. She is one of the newer Tiddly Ink images. I can't believe Tiddly Inks is only one year old. She has so many wonderful images it seems like it should have taken a lot longer to build up the library of characters, scenes, etc.
If you get a chance, I would like to recommend the blog hop over at Tiddly Inks. You can find the information here.
Then I was planning to take a picture similar to this:
and then I was going to bring my strawberries home and start making Strawberry Vanilla Jam and I was going to take pictures while I made the jam and then I would have posted those. Here is an older posts of my watermelon pickles.
HOWEVER...
When I arrived at the Farmer's Market today they had NO, absolutely NO strawberries. So, that messed up my entire post. But... I still had my card for the Tiddly Inks blog hop.
So, here you go...
It took me three different photograph sessions to get one shot that I liked. The image is called Minnie Berry. She is one of the newer Tiddly Ink images. I can't believe Tiddly Inks is only one year old. She has so many wonderful images it seems like it should have taken a lot longer to build up the library of characters, scenes, etc.
If you get a chance, I would like to recommend the blog hop over at Tiddly Inks. You can find the information here.
Thursday, April 7, 2011
Gingersnap Office Items Challenge
Hello Friends -
I could use some feedback here. I am a huge fan of the vintage/grunge/shabby style of papercrafting but I'm not very confident about my execution. To add to my nervousness, the creations over at Gingersnaps are incredible. I think they are really amazing and over the top gorgeous. So, I've been checking out the work they do but I have never joined in one of their challenges. However, I had some ideas for their challenge with office items. I've been thinking about these paperclips which look a bit like the old typewriter keys.
From there I searched for a vintage picture of an office. I really wanted my card to have women in it, as opposed to the offices with all men. I'm thinking about sending the card to one of my dear friends and an office full of men really wouldn't have been the right thing.
I was having trouble with the pattern paper so I stamped the typewriter image from the Hero Arts stamps I won from Papercraafter's Corner.
With the ribbon I was going for the look of an old typerwriter ribbon. Here on the Home Front I received a thumbs down on it looking anything like a typewriter ribbon. I used rayon seam binding and covered it in Black Soot Distress Ink. I can tell you my fingers look like I was changing typewriter ribbons. What do you think? Does it look like typewriter ribbon or just black ribbon crunched up?
What would make this card work better, considering the vintage style?
I could use some feedback here. I am a huge fan of the vintage/grunge/shabby style of papercrafting but I'm not very confident about my execution. To add to my nervousness, the creations over at Gingersnaps are incredible. I think they are really amazing and over the top gorgeous. So, I've been checking out the work they do but I have never joined in one of their challenges. However, I had some ideas for their challenge with office items. I've been thinking about these paperclips which look a bit like the old typewriter keys.
From there I searched for a vintage picture of an office. I really wanted my card to have women in it, as opposed to the offices with all men. I'm thinking about sending the card to one of my dear friends and an office full of men really wouldn't have been the right thing.
I was having trouble with the pattern paper so I stamped the typewriter image from the Hero Arts stamps I won from Papercraafter's Corner.
With the ribbon I was going for the look of an old typerwriter ribbon. Here on the Home Front I received a thumbs down on it looking anything like a typewriter ribbon. I used rayon seam binding and covered it in Black Soot Distress Ink. I can tell you my fingers look like I was changing typewriter ribbons. What do you think? Does it look like typewriter ribbon or just black ribbon crunched up?
What would make this card work better, considering the vintage style?
Wednesday, April 6, 2011
A Funny Card for the Ladies of Humbug Hall
This week the Ladies of Humbug Hall (Bah! Humbug! Christmas Challenges) have asked for a Christmas card to make you giggle. Now, they had a couple of real doozies so I was feeling a bit intimidated. What card could I make that would have folks giggling? With the traveling and all, I almost didn't do one but then, I remembered all the great digis from Bugaboo Stamps. Well, I did a bit of mix and matching (I always was a fan of those Garanimals). The sentiment is from one of the Stella images while the image of Fanny didn't have a sentiment.
Here is a close-up of the sentiment/tag.
and the image of Fanny. She is pop dotted because I would have never gotten her to lie flat on top of that ribbon. You can't exactly see it in this shot but I added Stickles to the bulbs and her earrings for a bit of sparkle.
I found this new (new to me) Christmas Card Challenge site which also had the theme of funny cards.
I wanted to leave you with some more artwork from our trip. On our way home from Ohio we stopped in Berea, KY. If you've never visited Berea, it is well worth a visit, especially if you are a fan of arts and crafts (which I'm guessing you are if you are still reading this blog). Here is a bit of the history of Berea, and a little bit about the school. Many people know of their strong Arts and Crafts programs but Berea College is a liberal arts school with many majors besides arts and crafts.
You have already seen my fascination with outdoor sculptures. I'm especially intrigued by the sculptures where an entire town/city has a series of sculptured all with the same base but each decorated for the artist or the organization commissioning the artwork.
In Berea it is hands. Here are a few of the ones we saw.
![]() |
| The Hand of the Creator |
![]() |
| Mano a Mano with Wonderkid |
![]() |
| Gone Fishing |
![]() |
| A Bird in the Hand |
![]() |
| Power of Make Belief |
![]() |
| We Make You Kindly |
While we were gone every leaf in the neighborhood arrived. I'll take some pictures tomorrow as it is quite a difference from my pictures just a week ago.
Subscribe to:
Posts (Atom)